This Week’s Harvest: Green Peas

By Daisy Luther
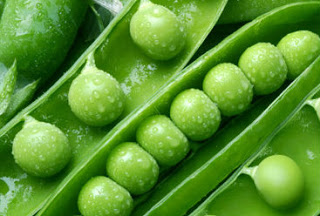
Sitting on the porch and shelling peas with the kids, watching the butterflies in the garden, and smelling the lilacs in bloom. (Telling the kids, “Put them in the bowl, not in your mouth!”) That is the scene at our place every year about this time. Green peas are a sure sign of spring. Whether you pick them from your own garden or buy them in overflowing baskets at the farmer’s market, now is the time to enjoy fresh, succulent green peas. (You can find a nearby farmer’s market HERE)
Some green pea trivia: Green peas are the first vegetable that was known to be cultivated as a food crop. Dried peas were a food staple in the Middle Ages and fresh peas were a delicacy in Early Modern European courts. Canada is the largest exporter of peas in the world because of their long, cool spring. William Wallace Irwin wrote a little homage about the pea in The Garrulous Gourmet (1947),”There is nothing so innocent, so confiding in its expression, as the small green face of the freshly shelled spring pea…the little green pea is so helpless and friendly that it makes really sensitive stomachs suffer to see the way he is treated in the average home. Fling him into the water and let him boil–and that’s that.”
Widget not in any sidebars
Health Benefits
Peas are more than just a pretty face in the garden. They are loaded with health benefits.
- A 1/2 cup serving of fresh peas contains: 62 calories, 4 grams of protein, 11 grams of carbohydrates, and 4 grams of fiber.
- Peas contain a variety of phytonutrients called saponins, which provide antioxidant and anti-inflammatory benefits, which aid in lowering the risk of heart disease, type 2 diabetes, and arthritis.
- Peas contain a high level of coumestrol- a phytonutrient that has been proven to lower the risk of stomach cancer.
- The tiny little legumes provide a hefty supply of vitamin A, the B complex vitamins (particularly folic acid), calcium,choline, iron, zinc, and potassium
Growing Peas
One of the best things about growing peas is that they actually give back to the soil more than they take. While most plants deplete the soil of nitrogen, peas take nitrogen gas from the air and convert it into a more usable form, which increases the nitrogen in the soil and decreases the need for fertilizer.
Peas are incredibly easy to grow. They can be planted 6 weeks before the last frost. They do not transplant well, so start them right in the garden. Peas thrive in cool, moist soil and stop producing when average temperatures are above 80 degrees F. Peas like to climb, so provide a trellis or a network of string or wire.
If you are wondering how many peas to plant, Organic Gardening provides this guideline:
Generally speaking, 1 pound of seeds will plant a 100-foot row and should produce around 1 bushel of green peas or 2 bushels of edible pods. Another rough guideline is to raise 40 plants per person. Unused seed is good for 3 years.
Selecting, Shelling, and Storing Green Peas
The pods of your peas should be a nice green color, and should be crisp, shiny, and firm. If the pods are yellow, wilted, or dull, the peas will not be as sweet and tender. As well, look for a small to medium sized pod. The younger peas found within them are much sweeter than the larger peas. Consume them as soon as possible after harvesting them for the best flavor. Store peas in the pod, in a plastic bag in the crisper drawer of the refrigerator, if you are not using them right away.
To shell your peas, break open the pods and run your thumb along the edge where the peas are attached to the pod, and collect them in a large bowl. One pound of peas in the pod works out to approximately one cup of peas.
 If the peas available to you are larger and more mature, they will need to be cooked longer if you are eating them fresh, and would work well for canning.
Preparing Fresh Peas
I’ll never forget the first time we harvested peas from our garden. My daughter said, “Mommy, why do these peas have belly buttons?” I looked, and sure enough, each pea had a little “outie” where it had been attached to the pod – an umbilical cord was a very good comparison. It made me realize how much all the processing in the grocery store peas changes the little vegetable from it’s original form.
Because of this, I firmly believe that the best way possible to enjoy your fresh peas is as simply as possible. You can enjoy them raw, right from the pod, or cook them lightly.
Once you’ve shelled your peas, set some water to boil in your steamer pot. When it is at a full boil, place the steamer basket full of peas in there for no more than one minute.
The resulting peas will be a vivid, glorious green, and they’ll still have some crunch to them – nothing like the mushy peas that you get from the tin cans. Season with some butter and salt, and if you want, you can add your choice of fresh herbs:
- mint
- dill
- basil
- chives
Peas make a lovely partner with baby potatoes and pearl onions, also fresh from the garden right now.
Preserving Peas
Dehydration
To freeze fresh peas, remove them from the pod, then blanch them in boiling water for 1-2 minutes. Immediately place the blanched peas into an ice bath. Remove the peas from the ice bath and pat them dry thoroughly. Place the peas in a single layer on the dehydrator racks. Dry in the dehydrator for about 6-10 hours. The peas will be wrinkled when dry. Store your dried peas in tightly closed glass canning jars.
Freezing
To freeze fresh peas, remove them from the pod, then blanch them in boiling water for 1-2 minutes. Immediately place the blanched peas into an ice bath. Remove the peas from the ice bath and pat them dry. Place them on a cookie sheet in a single layer and place this in the freezer for two hours. Store the frozen peas in large freezer bags.
Canning
Peas are a low acid vegetable so they MUST be pressure canned. Count on approximately one pound of peas in the pod per pint jar of peas.
Widget not in any sidebars
Ingredients:
- Peas
- Salt (optional)
- Boiling water
Directions:
- Shell your peas.
- Place the peas into your sanitized jars, allowing 1 inch of headspace for expansion.
- Top each jar with a sprinkle of salt (optional) and cover the peas with boiling water. Wipe the rim and cap your jars with snap lids and rings.
- Process in a pressure canner for 30 minutes, adjusting for altitude.
Daisy Luther is a freelance writer and editor. Her website, The Organic Prepper, where this article first appeared, offers information on healthy prepping, including premium nutritional choices, general wellness and non-tech solutions. You can follow Daisy on Facebook and Twitter, and you can email her at [email protected]