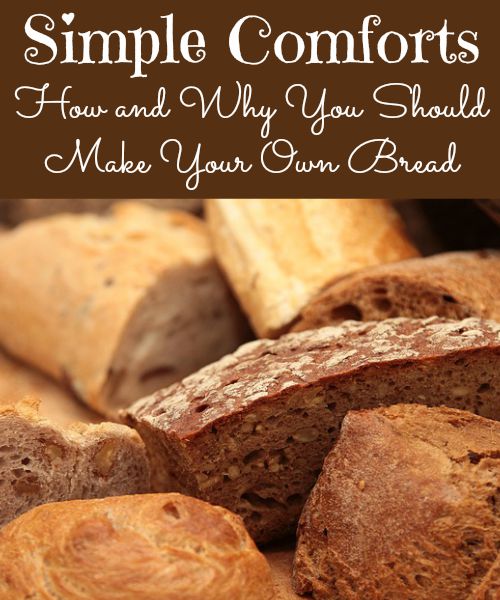
Simple Comforts: How and Why You Should Make Your Own Bread
 By Gaye Levy
I’m pretty sure that if there’s a key to happiness, it is baking your own bread. Think about it…
The smell when you proof the yeast.
Mixing all those fresh ingredients like a chemist.
Then, you put it in the oven and don’t even get me started about the smell! There is something special about that aroma created from the mixture of flour, water, yeast, and salt that makes you feel that all is right with the world.
Then…you get to slice into it, slather it with butter that melts on contact, and eat the entire loaf at one meal. (That is, if it lasts long enough to make it to the dinner table.)
Widget not in any sidebars
And as great as all of those reasons are, they aren’t even the best reasons to bake your own bread! If you’re still buying bread from the store, read on for some further rationalization of why the extra effort to make your own at home is a very worthwhile endeavor.
Why You Should Be Baking Your Own Bread
Here are 8 satisfying reasons why you should break out the yeast and start baking bread.
1. Baking your own bread saves money. I have not run a precise calculation, but as far as I can tell, the cost is only 40 to 60 cents per loaf, depending on whether or not you purchase your ingredients in bulk or on sale.
2. Homemade bread is healthier. When you bake from scratch, you know the source of every single ingredient, and you can avoid GMOs, unhealthy fats like hydrogenated oils, chemical additives, unhealthy preservatives, and sugary sweeteners like high-fructose corn syrup.
3. Taste is king. Homemade bread tastes better than store bought. No contest. Even boo boos that look weird still taste good.
4. The aroma is captivating. I know I mentioned this above but it bears repeating. This is the ultimate in aromatherapy.
5. Your friends, family, and neighbors will be impressed. Okay, maybe this is not important to you but you yourself will be impressed and that does count.
6. When or if the doo-doo hits the fan and the power is out, you can make the simple recipe I’m providing here on a camp stove or barbecue. It cooks up swell in a closed grill and there is even a version that can be made on the top of a grill. Talk about the ultimate comfort food.
7. This particular recipe is so simple you don’t have to knead it. You just stir up a big batch of dough, put it in the refrigerator for up to two weeks, then when you want some bread, you take out a blob whatever size you want your loaf to be, and bake it up fresh.
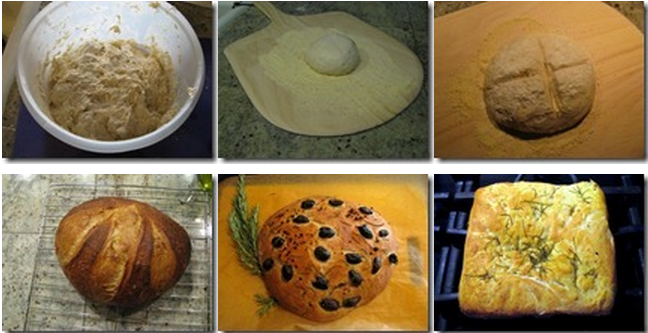
8. You can dress a basic recipe up however you want once you’ve gotten the hang of it. Here is a photo of some of the lovely homemade bakery-worthy artisan breads I’ve made:
 OK, I’m positive you’re convinced now, so let’s talk about taking your bread to the next level. Let us move on to the absolute pinnacle of home bread baking.
Grinding Wheat For Making Homemade Bread
If you have a few (or more than a few) buckets of wheat berries, raise your hand. Yep, pretty much everyone has them on hand if they are involved in preparedness. After all, they last nearly forever when properly stored in their unprocessed form.
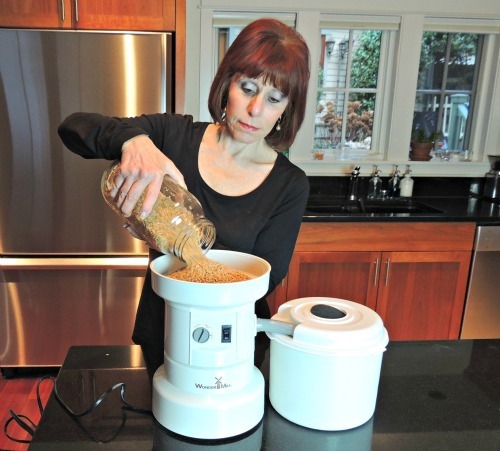 I use a Wondermill grain mill for my grinding needs. It’s simple to use, doesn’t make a huge mess, provides 3 different lovely textures, and clean-up afterward is fast and easy. I normally use the electric one, but I also own and use a manual grain mill to keep in shape for grinding wheat and other grains during grid-down scenarios.
Wheat in its most basic form lasts far longer than flour. Even when carefully stored, it doesn’t take long for the oils in flour to become rancid. And if you’re using whole wheat flour, this happens even faster.
So, back to grinding.
The Wondermill is quite compact and streamlined. The way it works is that you turn on switch, pour your wheat (or other grains) into the hopper, and let it run. In less than a minute, wheat turns into flour that is transported via a piece of rubber tubing into a separate, storable container.
 There are three separate settings on the mill itself: pastry, bread and course. The “bread” setting produces a nice fine flour, not dissimilar in texture to regular unbleached flour that is purchased commercially.
During the grinding/milling process, the unit does get warm and puts forth a sweetish smell. I would imagine that this smell might be unique to the type of grain being used. The grain I prefer to use is hard white wheat that I purchase from Emergency Essentials, the local Winco (fantastic store that I only recently discovered, or the LDS Home Store. Normally, one cup of wheat produces a tad less than 1.5 cups of flour.
As interesting as the technical details might be to some, to me the real tale is in the results. How does the fresh-ground flour turn out within the context of a real loaf of bread?
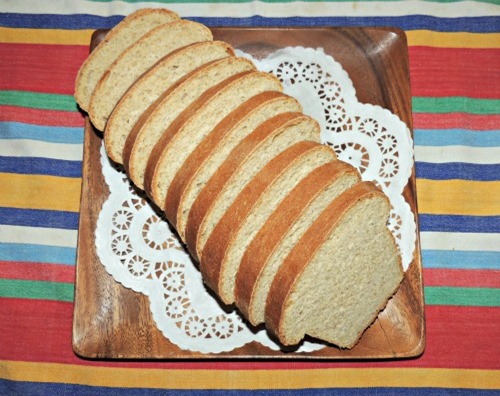 The flavor of my bread was, as I described it to a friend, the “best darn whole wheat bread I have ever tasted”. It had a fresh sweet flavor unlike any other bread I have purchased or made myself. I made no adjustment to my standard recipe that and found that the loaves raised and baked up quite nicely with a nice crumb and a rich golden color. I did feel that the bread was slightly more dense and a bit more filling than normal.
There is a unique satisfaction when you take your baking to a new level of deliciousness. Another thing is that I like the idea that I can grind only what I plan on using right away or over the next couple of weeks at the most. This means my flour is always fresh. If you have been baking for awhile, you know that old flour gets stale and looses its oomph.
The Easiest Bread You Will Ever Make – Recipe Included!
Years ago, I happened upon a YouTube video demonstrating how to make artisan bread using a no-knead method for as little as fifty cents a loaf. Fifty cents! I was hooked. And so began my love affair with Jeff Hertzberg and Zoe Francois and their book, Artisan Bread in Five Minutes a Day: The Discovery That Revolutionizes Home Baking. The book as I learned, described an incredible, no-knead method for making the most delicious bread you’ve ever tasted.
Essentially, the Artisan Bread In Five method of bread-baking (Master Recipe below) involves combining four basic ingredients in a tub. The tub of dough sits on the counter for a couple of hours to rise and is then refrigerated for up to two weeks. The five minute part begins when you are ready to bake some bread.
 What you do is cut off a grapefruit-sized ball, do a quick, 30-second shaping, then place the dough on a board or piece of parchment and let it rest for about 40 minutes. It then gets popped into a very hot oven where it springs to life as a lovely loaf of delicious artisan bread. Yes, it is truly that simple and the only real labor involved takes five minutes, if that.
The Artisan Bread In Five secret is that the pre-mixed, pre-risen, high moisture dough requires no kneading plus it keeps well in the refrigerator. This eliminates the need to measure out the ingredients, mix them up and knead the dough when you wish to put a fresh loaf of crusty, wholesome bread on the table.
No special equipment is needed and there is no messy kneading. Ever. Talk about easy peasy!
That’s All Good, But What About the Bread Itself?
Because using fresh ground wheat is important to me, I have use the Artisan BIN5 “Master Recipe” below using various combinations of 100% of unbleached white flour, 100% freshly milled hard white wheat flour and a combination of the two. They all turn out great.
The Master Recipe: Artisan Bread In Five
Makes four 1 pound loaves.
- 3 cups lukewarm water (about 100 degrees)
- 1-1/2 tablespoons granulated yeast (about 1-1/2 packets)
- 1-1/2 tablespoons kosher salt (can use less)
- 6-1/2 cups unsifted, unbleached flour, measured with the scoop & sweep method
- Cornmeal for pizza peel or parchment paper (I used parchment)
Note: I typically will use a combination of unbleached white flour and freshly ground/milled flour
1. In a large bowl or plastic container, mix yeast and salt into 3 cups lukewarm water (about 100 degrees). Stir in flour, mixing until there are no dry patches. I use a Danish dough whisk to mix things up but you can use a spoon or even a stand mixer or food processor. But why do that? The hand mixing is the fun part.
It really does not matter how you mix the wet and dry ingredients as long as the mixture is uniform. The dough will be quite loose so don’t panic. Cover, loosely and let the dough rise at room temperature 2 hours (or up to 5 hours).
2. Bake at this point or refrigerate, covered, for as long as two weeks. When ready to bake, sprinkle a little flour on dough and cut off a grapefruit-size piece with serrated knife. Turn dough in hands to lightly stretch surface, creating a rounded top and a lumpy bottom.
3. Put dough on pizza peel sprinkled with cornmeal; let rest 40 minutes or up to 90 minutes. Repeat with the remaining dough or refrigerate it. (Or skip the peel and use parchment paper on a baking sheet.)
4. Place a broiler pan on bottom of oven. Place baking stone on middle rack and turn oven to 450 degrees; heat a baking stone at that temperature for 20 minutes. Or, if you don’t have a baking stone, use a cast iron skillet or even a greased baking sheet.
Bonus: You can also shape the dough and bake it in a traditional loaf pan! See the book for details.
5. Dust dough with flour, slash top with serrated or very sharp knife three times. Slide onto stone. Pour one cup hot water into broiler pan and shut oven quickly to trap steam. Bake until well browned, about 30 minutes. Cool completely.
The Final Word
As far as I am concerned, baking bread from scratch is a no-brainer. Not only will you save a lot of money, but your bread will be healthier and will taste better. Plus, in a SHTF situation, having the skill to bake delicious breads from simple ingredients will make you a valuable community asset and will give you something to barter should the need arise.
Trust me. If I can make artisan bread, so can you. Have fun with this and be sure to experiment with different flour combinations. I am confident that the results will be delicious!
Enjoy your next adventure through common sense and thoughtful preparation!
Gaye started Backdoor Survival to share her angst and concern about our deteriorating economy and its impact on ordinary, middle-class folks. She also wanted to become a prepper of the highest order and to share her knowledge as she learned it along the way. She considers her sharing of knowledge her way of giving back and as always, we at Natural Blaze are grateful for her contributions. If you would like to read more from Gaye Levy, check out her blog at http://www.backdoorsurvival.com/. You can also visit her Facebook page or sign up for updates by email by clicking on Backdoor Survival Updates.